To configure email sending from your cPanel server to Microsoft 365, you need to follow several steps, including DNS setup and updating the records to ensure emails are correctly handled.
Access cPanel
- Log in to your cPanel account.
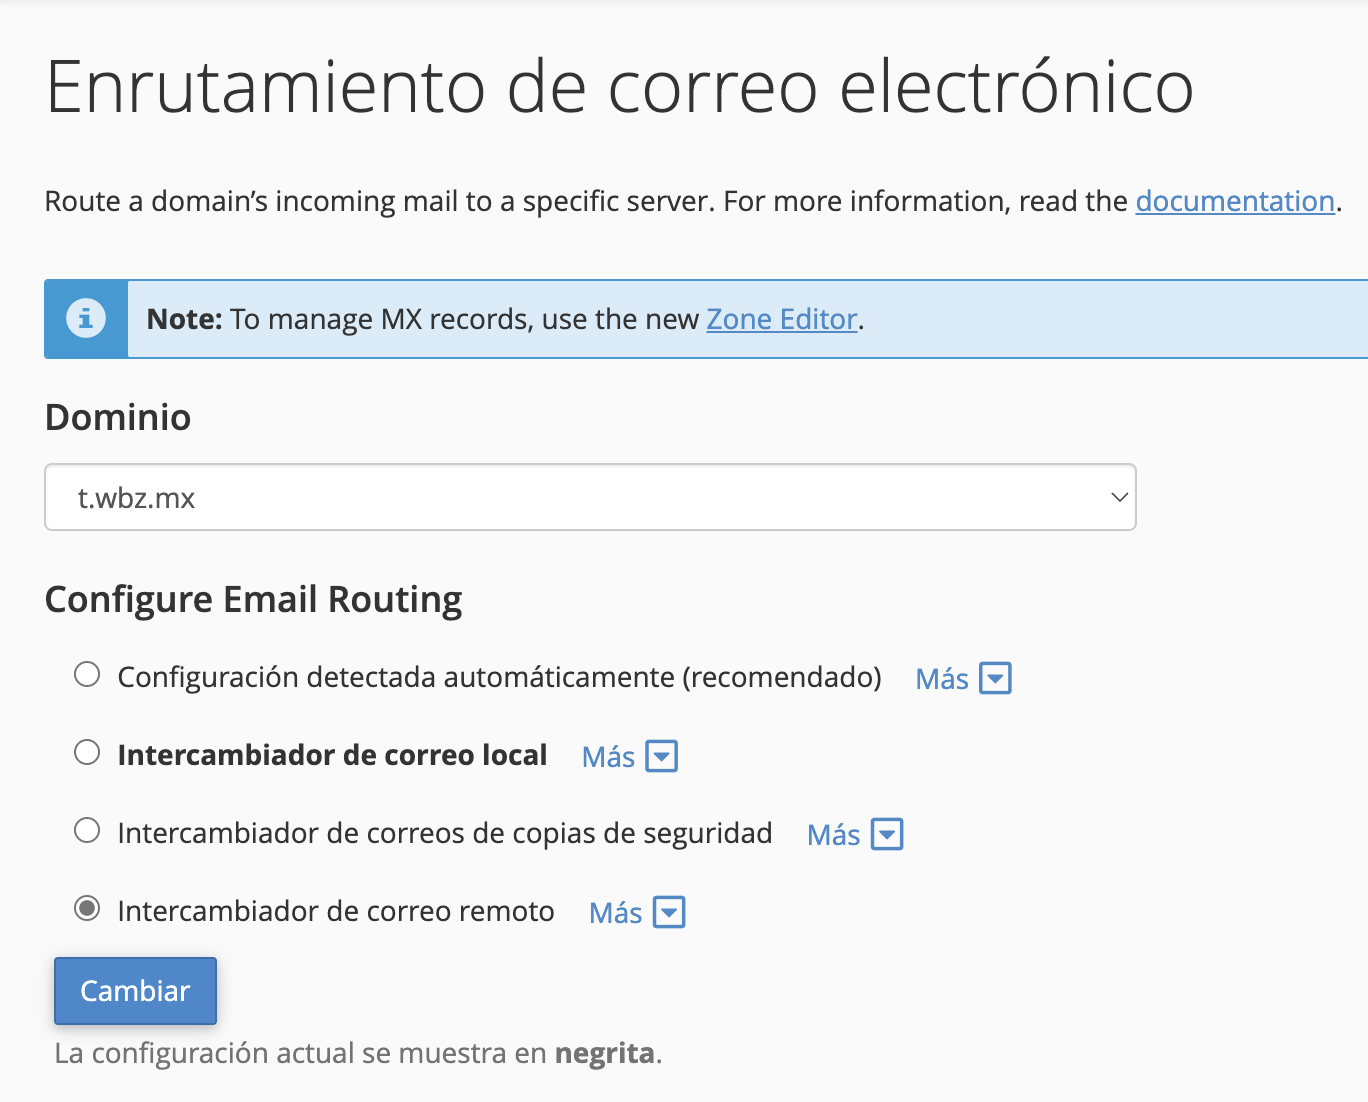
- Go to the Email Routing section to make sure mail routing is properly configured. Ensure you select Remote Mail Exchanger to route emails remotely through Microsoft 365.

Configure DNS Records
You will need to configure the following DNS records: MX, SPF, DKIM, and CNAME.
MX Record
MX records direct emails to Microsoft 365 servers.
Priority: 0
Server Name: yourdomain-com.mail.protection.outlook.com
Replace yourdomain-com with your domain name and adjust the format as needed.
- This record must have a Priority of 0 to ensure Microsoft 365 is the sole server managing your emails.
SPF Record
The SPF record helps prevent unauthorized parties from sending emails from your domain.
- Record Type: TXT
- Value: v=spf1 include:spf.protection.outlook.com -all
This value specifies that Microsoft 365 is authorized to send emails from your domain.
DKIM (DomainKeys Identified Mail) Record
DKIM authenticates outgoing emails to prevent them from being marked as spam. Microsoft 365 automatically generates DKIM keys, but you must enable it in the Microsoft 365 admin portal.
- From the admin portal, enable DKIM for your domain.
CNAME Record for Autodiscover
To allow email applications to automatically configure Microsoft 365 settings, you need to add a CNAME record for Autodiscover.
- Record Type: CNAME
- Name: autodiscover.yourdomain.com
- Destination: autodiscover.outlook.com
Update DNS Records in cPanel
- In cPanel, go to the Zone Editor.
- Select your domain.
- Add and update the MX, TXT (SPF), and CNAME records as previously described.
- Make sure to remove any other MX records that don’t correspond to Microsoft 365 to avoid conflicts.

In summary, the records to configure are:
- MX: yourdomain-com.mail.protection.outlook.com
- SPF (TXT): v=spf1 include:spf.protection.outlook.com -all
- CNAME: autodiscover.outlook.com
After configuring the DNS records, wait for a few hours for the changes to propagate. Once active, you can verify the setup in the Microsoft 365 admin portal.
